Classwork Assignments
Assignment 1: Bling
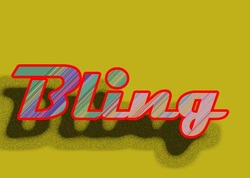
Create a new document. Choose a background color and hit Ctrl+Backspace to fill the
layer. Create a text box by hitting T, then set the size of the box. Type in
your text using Magneto font with a black foreground color. Go to Layer Styles
and select Inner Glow, Bevel and Emboss, Pattern Overlay, Gradient Overlay
(brown and white gradient), and Stroke (gray color). Hit Ctrl+J to duplicate the
layer. Drag the original layer above the copy layer, then clear the styles from the copy layer. On the copy layer, go to Edit > Transform > Skew to tilt the text. Go to Filter > Blur > Gaussian Blur (make sure to rasterize the text) and dilute the shadow as necessary. Activate the Brush tool by hitting B, and choose a “sparkle” brush with a blue foreground color. Paint around the text to create sparkles. Make sure the copy layer is between the original layer and
the Background layer, then right-click on the copy layer and select Merge Visible.
Assignment 2: Cold
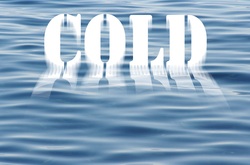
Open the (water) image. Copy the layer and type your text. Rotate it 90 degrees by going to Edit > Transform > Rotate 90 (clockwise or counterclockwise is your choice). Go to Filter > Stylize > Wind and apply the filter repeatedly by doing Ctrl+F multiple times. Go to Edit > Transform and rotate 90 the other direction. Copy the layer. Go to Edit > Transform > Flip Vertical and use the Move tool to drag down. Use the Eraser tool to make the lower text appear as if it is fading.
Assignment 3: Fire
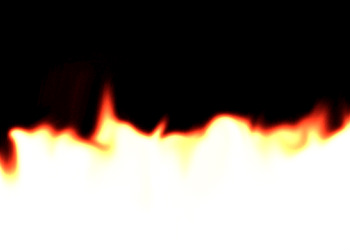
Create a new layer with a black background color. Type your text using Franklin Gothic font with a white foreground color. Use the Smudge tool to draw “flames” on the text. Go to the layer and apply a black-to-orange gradient.
Assignment 4: Flame (Gif)
To make gifs, go to Window > Animation and select the frames in the order you want. To save gifs, go to File > Save for Web & Devices or hit Alt+Shift+Ctrl+S. Tweening gifs makes them slower.
Assignment 5: Grass
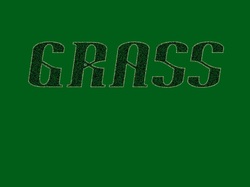
Create a 400 pixel by 400 pixel layer with a yellow background color and a red
foreground color. Type your text using Franklin Gothic Heavy. Go to Filter > Sketch > Torn Edges and set Image Balance to 50, Smoothness to 1, and Contrast to 25. Click OK. Apply a Gaussian Blur with a 3.8 radius. Go to Layer Styles and apply Inner Shadow, Outer Glow, Inner Glow, and Bevel and Emboss. Click on the Background layer and change the background color to green.
foreground color. Type your text using Franklin Gothic Heavy. Go to Filter > Sketch > Torn Edges and set Image Balance to 50, Smoothness to 1, and Contrast to 25. Click OK. Apply a Gaussian Blur with a 3.8 radius. Go to Layer Styles and apply Inner Shadow, Outer Glow, Inner Glow, and Bevel and Emboss. Click on the Background layer and change the background color to green.
Assignment 6: Clipping Mask
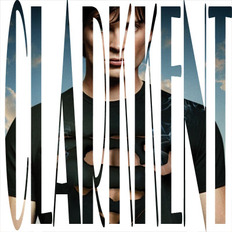
Open your image. Copy the layer, then, on the copy, change one of the dimensions to
400 pixels by going to Image > Image Size or hitting Alt+Ctrl+I. Go to View
> Fit on Screen or hit Ctrl+0. Create a text box and type your text with a white font. Hit Ctrl+T and stretch the text to fit in the image. Create a new layer and change the background color to white. Make sure that, from top to bottom, the layers are the image copy, the text layer, the white layer, and the image. Go to the image copy and go to Layer > Create Clipping Mask or hit Alt+Ctrl+G.
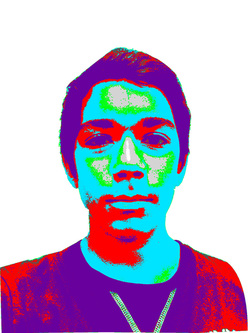
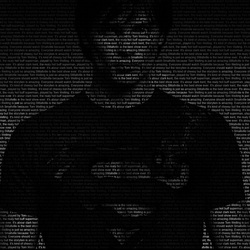
Assignment 7: Thousand Word Portrait
Open
your image. Use the Lasso/Pen tool to select your area. Hit Enter (if using
Lasso) or right-click and click Make Selection (if using Pen), then hit Ctrl+J.
On your copy layer (hereby “Layer A”), go to Image > Adjustments > Posterize. On Layer A, go to Select > Color Range, choose Shadows, and hit Ctrl+J. On the shadow layer, hit Shift+F5 and choose Black, making sure to check “Preserve Transparency”. Go back to Layer A, go to Select > Color Range, choose Midtones, and hit Ctrl+J. On the midtone layer, hit Shift+F5 and choose 50% Gray, again making sure to check “Preserve Transparency”. Merge the shadow layer and the midtone layer. Create a new layer and fill it with white (if you do this with Shift+F5, make sure to uncheck “Preserve Transparency”). Create a new layer and do your brushing on it. Hide every layer except the shadow and midtone layer. Go back to the shadow and midtone layer and hit Ctrl+A, then Ctrl+C. Go to the brush layer and add a layer mask. Click on the layer mask while holding Alt, then hit Ctrl+V, Ctrl+D, and Ctrl+I (in that order). Unhide the white layer and the layer mask layer. Click on any other layer.
Assignment 8: Select Similar Tool
Open image, select with Pen, Ctrl+J, Posterize, Desaturate, define pattern, select
color area with Rectangular Marquee, Select > Similar.
color area with Rectangular Marquee, Select > Similar.
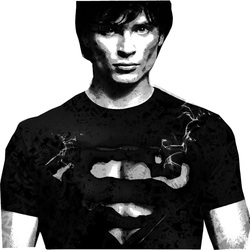
Assignment 9: Text Portrait
To create a text portrait, open your picture. Create a new layer and fill it with
black. Create a text box and type in your text with a white font. Go back to the
Background layer and hit Ctrl+A, then Ctrl+C. Add a layer mask on the text
layer, and while holding Alt, click on the layer mask. Hit Ctrl+V, then click on
the black layer.
black. Create a text box and type in your text with a white font. Go back to the
Background layer and hit Ctrl+A, then Ctrl+C. Add a layer mask on the text
layer, and while holding Alt, click on the layer mask. Hit Ctrl+V, then click on
the black layer.
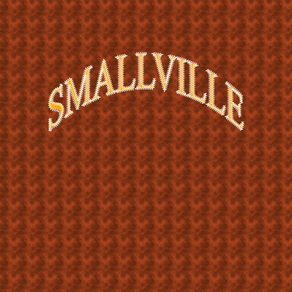
Assignment 10: Stitches
first open a new thing and then unlock the background layer. after that go to layer
layer styles and then put in any pattern overlay (denim). use the text and type
in anything (PAUL). transform it to your choosing and then go to the top right
where there is a squiggly t, then choose the arc option. create a new layer above it and call it stitching. right click using the text tooth and create work path. go back to the name layer and make sure your stitching brsuh is selected. use the pen tool and then use the cross hairs to right click and then stroke path and then choose brush. click ok and you’re done. It's a little hard to see because of the economy.
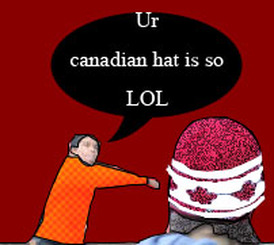
Assignment 11: Ipod Silhouette

Select the image, right-click and click Make Selection, hit Ctrl+J and fill the copy
with black, preserving the transparency. Create a new layer and fill it with red
(or the color of your choice), then drag the image copy above the red (colored)
layer. In this picture, you see some extra things, but it's just some simple text and a valentines heart over a silhoulette of myself.
with black, preserving the transparency. Create a new layer and fill it with red
(or the color of your choice), then drag the image copy above the red (colored)
layer. In this picture, you see some extra things, but it's just some simple text and a valentines heart over a silhoulette of myself.
Assignment 12: Lichtenstein Portrait
Open image, copy image, Filter > Artistic > Film Grain, Filter > Pixelate > Color Halftone, Layer > Layer Style > Blending Options and set Blend Mode to Darken, put a stroke around the image (position on inside), Rectangular Marquee (twice on two new layers), drag from the inside corner of the stroke, fill marquees with white and yellow, put a gradient on the yellow marquee, text boxes over marquees, put strokes around the text boxes.
Assignment 13: Retro Comic
This is exactly the same thing as the Licheinstein portrait. I just combined muliple L ichtenstein portraits.
Assignmetn 14: Wrapped Text
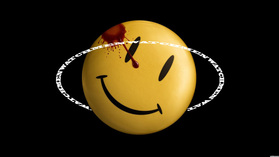
text wrapping around an object:Elliptical Marquee tool will give an ellipse Path tabs>make work path from selections (at the bottom)>text tool , will create another work path. A shortcut to hiding the path is Cntrl-H. That will hide the path Control T to transform must create a layer mask to the text layer use the brush to blacken it, it should disappear.
Assignment 15: Pen Tool
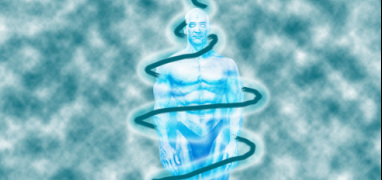
use the pen tool to make a path use render and lens flare to stroke a path with a neon affect
drop shadow and an outer glow, depending on the size of your image, you can determine
what adjustments you’re making layer mask and then coloring black filter render and lens flare.
drop shadow and an outer glow, depending on the size of your image, you can determine
what adjustments you’re making layer mask and then coloring black filter render and lens flare.
Assignment 16: Brain

This is a collection of several photos stacked on top of each other. Go to transform>warp to warp all the photos to your choosing.
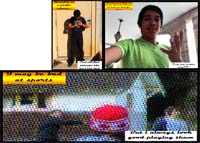
Personal Project 1: Valentines day (Gif)
Use the same tools for the fire gif to make the words appear and disappear in a certain order.
Personal Project 2: Jesus
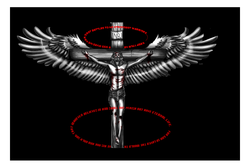
You can see the eliptical tool in this photo. Unfortunately, rendering clouds and my neon path taren't showing up.
